


Achieve a Pristine Stovetop by Removing Burnt-on Residue
Posted on 22/05/2025
Achieve a Pristine Stovetop by Removing Burnt-on Residue: The Ultimate Guide
Every cooking enthusiast dreads the stubborn, unsightly burnt-on residue that accumulates on stovetops. Not only can it hinder your kitchen's aesthetic appeal, but it may also affect cooking efficiency and hygiene. If you've ever wondered how to restore your stovetop to a sparkling clean finish, you've come to the right place. This comprehensive article will walk you through effective techniques, recommended tools, and preventative measures for removing burnt-on residue and achieving a spotless stovetop.
Why Is It Important to Remove Burnt Stovetop Residue?
Burnt-on residue does more than just mar the appearance of your stove. Here's why regular cleaning should be on your kitchen to-do list:
- Prevents Cross-Contamination: Food particles trapped in residue can harbor bacteria.
- Enhances Performance: A clean surface ensures even heat distribution and cooking efficiency.
- Increases Appliance Longevity: Residue buildup can cause corrosion and damage heating elements over time.
- Improves Kitchen Hygiene: Clean appliances contribute to a healthier cooking environment.
- Boosts Aesthetics: A gleaming stovetop transforms the look and feel of your kitchen.
Types of Stovetops and Their Cleaning Needs
Different stovetops require tailored care. Understanding your appliance's material is the first step towards achieving a pristine stovetop free of stubborn residue.
1. Gas Stovetops
Gas stoves feature removable grates and burners. Their components are prone to catching greasy and burnt food, making deep cleaning essential.
2. Electric Coil Stovetops
These models have exposed heating coils. While durable, spills and drips can easily become burnt-on, requiring periodic removal and washing.
3. Glass or Ceramic Stovetops
Common in modern kitchens, these sleek surfaces show every smudge and scorch. However, they need gentle, non-abrasive treatment to avoid scratches.
Step-by-Step Methods to Eliminate Burnt-on Stovetop Residue
Ready to restore your stovetop's shine? Follow these expert-recommended steps to tackle even the toughest burnt-on food and grease:
Preparation: Gather Your Cleaning Tools and Supplies
- Soft sponges or microfiber cloths
- Non-abrasive scrubbing pads
- Baking soda
- Vinegar
- Warm water
- Mild dish soap
- Razor blade scraper (for glass/ceramic surfaces)
- Old toothbrush
- Stovetop cleaner (optional, tailored to stove type)
- Protective gloves
Step 1: Initial Cleaning and Debris Removal
Never start with a hot stove. Always ensure your cooktop has fully cooled to prevent injuries or burns:
- Remove grates, burner caps, or coils as possible.
- Wipe loose crumbs, grease, or charred bits using a damp cloth.
- Soak removable parts in hot, soapy water to loosen grime.
For glass or ceramic stovetops, proceed gently to avoid scratching.
Step 2: Tackle the Burnt-on Residue
This step focuses on breaking down stubborn, cooked-on messes, a key technique in removing burnt-on residue from stovetops:
- For Metal Gas and Electric Stoves: Make a paste with baking soda and water. Spread thickly over burnt areas and let it sit for 20 minutes to loosen debris.
- For Glass or Ceramic Stovetops: Sprinkle baking soda, spray with vinegar, and let fizz for 10-15 minutes. Alternatively, use a specialized glass stovetop cleaner.
Pro tip: Lay a warm, damp towel over the cleaning paste to help dissolve especially tough spots.
Step 3: Gentle Scrubbing and Lifting Residue
Use a soft sponge or a non-scratch scrubbing pad to work the area in circular motions. For intricate areas, use an old toothbrush. Avoid steel wool or highly abrasive pads, as these can damage finishes.
- For stubborn, stuck-on gunk, carefully use a razor blade scraper (only on glass or ceramic) at a 45-degree angle, gently lifting up burnt spots.
- Scrub grates, coils, and burners separately before rinsing and drying them thoroughly.
Step 4: Rinsing Away Remnants
Wipe the stovetop with a clean, damp cloth to remove all residues of cleaning agents and loosened debris. Repeat as needed until the surface feels smooth and residue-free.
Step 5: Polishing and Finishing Touches
- Use a dry microfiber cloth to buff the surface for a sparkling finish.
- Reassemble removable parts and ensure everything is dry before turning your stovetop on.
Proven Home Remedies for Restoring Your Stovetop's Shine
Don't have fancy products? No problem! Household staples often do a remarkable job of eradicating burnt food and scorched stains from your stove:
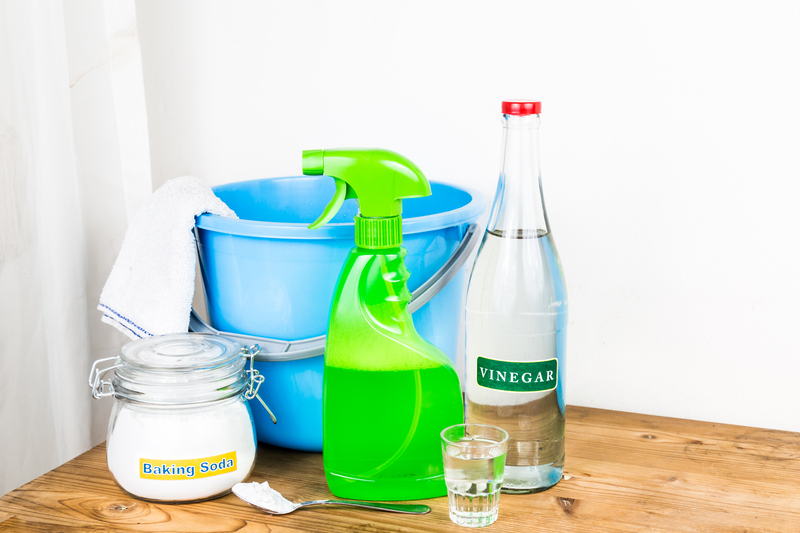
The Baking Soda and Vinegar Method
This classic duo is renowned for its effectiveness. Here's how to do it:
- Sprinkle baking soda generously over burnt areas.
- Pour or spray white vinegar across the baking soda.
- Allow the mixture to fizz for several minutes, then scrub with a damp cloth.
- Rinse thoroughly and dry.
Lemon Juice for Light Scorch Marks
The acidity in lemon juice helps cut through grease and minor burnt spots:
- Rub a cut lemon directly onto residue.
- Let it sit for a few minutes, then wipe clean with a damp sponge.
Hydrogen Peroxide and Baking Soda
For heavy-duty stains, combine hydrogen peroxide with baking soda to form a paste. Apply and let sit before scrubbing.
Special Considerations for Glass and Ceramic Stovetops
Glass and ceramic surfaces demand extra care to avoid scratches. Here's how to clean burnt-on residue on these sensitive appliances:
- Always use a non-abrasive pad.
- Only use razor scrapers designed specifically for glass surfaces.
- Do not use acidic cleaners (like vinegar) excessively, as prolonged use can erode the shine.
- Buff with a microfiber cloth for a streak-free finish.
Commercial Cleaners Versus DIY Solutions
When should you opt for a store-bought cleaner versus homemade remedies for burnt-on stovetop residue?
- Commercial cleaners: Ideal for persistent, large, or old stains; ensure they're compatible with your stovetop material and always follow safety directions.
- Homemade solutions: Affordable, eco-friendly, and often effective for routine cleaning.
Many homeowners choose a hybrid approach for the best results.
Preventing Burnt Residue on Your Stovetop
The secret to a spotlessly clean stovetop is not just knowing how to clean, but also how to prevent kitchen mishaps and stains from happening in the first place:
- Wipe Spills Instantly: Clean as you cook to stop food from baking onto the surface.
- Use Splatter Guards: Place them over pans and pots to minimize mess.
- Deep Clean Regularly: Schedule a thorough clean once a week for high-use stoves.
- Choose the Right Cookware: Flat-bottomed pots distribute heat evenly, reducing boiling over and burning.
- Season Burner Grates: For gas stoves, lightly oil grates after cleaning to repel future spills.
Safety Tips When Removing Burnt Stovetop Residue
Always keep these safety pointers in mind while cleaning stubborn stove stains:
- Wear gloves when handling chemical cleaners or abrasive materials.
- Ensure proper ventilation when using store-bought cleaning agents.
- Unplug electric stoves before removing coils or undertaking deep cleaning.
- Don't mix cleaning products: Some chemicals can react dangerously when combined.
Frequently Asked Questions About Removing Burnt Residue from Stovetops
Can I use steel wool to clean my stovetop?
It's generally not recommended, especially on glass, ceramic, or stainless steel surfaces, as it can leave permanent scratches.
How can I safely clean around gas burners?
Use a toothbrush or cotton swab for hard-to-reach spots. Make sure all parts are thoroughly dry and reassembled correctly to avoid gas leaks.
What about stubborn stains that won't budge?
Apply a baking soda paste and let it sit longer, or use a specialized stovetop cleaner. For glass cooktops, a razor scraper often helps.
Can burnt-on residue cause smoke or odors while cooking?
Yes! Old residue can produce unpleasant smoke or smells. Remove it promptly for a fresh, odor-free kitchen.

Maintaining Your Stovetop's Pristine Appearance
Once your stovetop is sparkling, keeping it that way is easier than you'd think. Here are some key habits:
- Wipe down the surface after every use.
- Deep clean weekly or immediately following any large cooking project.
- Promptly remove any new spills or overflows.
- Consult your stovetop manufacturer's manual for recommended cleaning products and techniques.
Conclusion: Enjoy a Spotless, Pristine Stovetop Free of Burnt-on Residue
Acheiving a spotless stovetop by removing burnt-on residue is a badge of honor for any home chef. By utilizing the expert techniques detailed in this article, you'll not only revive your stove's appearance but enjoy a safer, more efficient cooking environment as well. Whether you prefer tried-and-true DIY methods or the reliability of commercial products, consistency is key. Remember to treat your appliance gently, clean regularly, and enjoy your gleaming kitchen centerpiece for years to come!
Want to achieve a pristine stovetop every day? Bookmark this guide, and you'll never be daunted by burnt-on residue again.
Latest Posts
Keep Your Home Immaculate with a Reliable Cleaning Routine
Creative Hacks for Organizing a Petite Wardrobe
Tenant's Survival Guide to End of Tenancy House Cleaning
Ensuring the Longevity of Your Leather Sofa with Steam Cleaning
